Only a slight nudge at from @CodyHosterman to put this post together.
Kubernetes deployed into AWS is a method many organizations are using to get into using K8s. Whether you deploy K8s with Kubeadm, Kops, Kubespray, Rancher, WeaveWorks, OpenShift, etc the next big question is how do I do persistent volumes? While EBS has StorageClass integrations you may be interesting in getting better efficiency and reliability than traditional block in the cloud. That is one of the great uses of Cloud Block Store. Highly efficient and highly reliable storage built for AWS with the same experience as the on prem FlashArray. By utilizing Pure Service Orchestrator’s helm chart or operator you can now take advantage of Container Storage as a Service in the cloud. Are you using Kubernetes in AWS on EC2 and have questions about how to take advantage of Cloud Block Store? Please ask me here in the comments or @jon_2vcps on twitter.
- Persistent Volume Claims
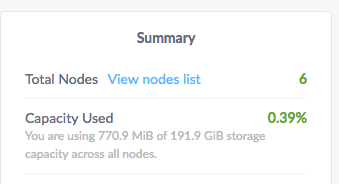
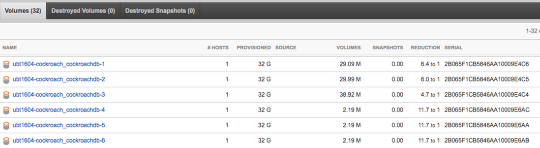
maywill not always be 100% full. Cloud Block Store is Deduped, Compressed and Thin. Don’t pay for 100% of a TB if it is only 1% full. I do not want to be in the business of keeping developers from getting the resources they need, but I also do not want to be paying for when they over-estimate. - Migrate data from on prem volumes such as K8s PVC, VMware vVols, Native physical volumes into the cloud and attach them to your Kubernetes environment. See the youtube demo below for an example. What we are seeing in the demo is creating an app in Kubernetes on prem, loading it with some data (photos), replicating that application to the AWS cloud and using Pure Service Orchestrator to attach the data to the K8s orchestrated application using Cloud Block Store. This is my re-working of Simon’s tech preview demo from the original launch of Cloud Block Store last November.
3. Simple. Make storage simple. One common tweet I see on twitter from the Kubernetes detractors is how complicated Kubernetes can be. Pure Service Orchestrator makes the storage layer amazingly simple. A single command line to install or upgrade. Pooling across multiple devices.
Get Started today:
Below I will include some links on the different installs of PSO. Now don’t let the choices scare you. Container Storage Interface or CSI is the newest API for common interaction with all storage providers. While flexvol was the original storage solution it makes sense to move forward with CSI. This is very true for newer versions of kubernetes that include CSI by default. So if you are starting to use K8s for the first time today or your cluster is K8s 1.11 we have you covered. Use the links below to see the install process and prerequisites for PSO.
FlexVol Driver:
Pure Service Orchestrator Helm Chart
Pure Service Orchestrator Operator
CSI Driver:
Pure Service Orchestrator CSI Helm
Pure Service Orchestrator CSI Operator