Note: Most of this was written as vSphere Cloud Provider in K8s was transitioned to the Cloud Native Storage CSI driver. Use CNS and CSI when you can, the more stable versions of PKS don’t support CSI by default as the K8s version is older. Use PSO for ReadWriteMany on Pure FlashBlade and CNS for block on FlashArray with VMFS Datastores (vVols coming).
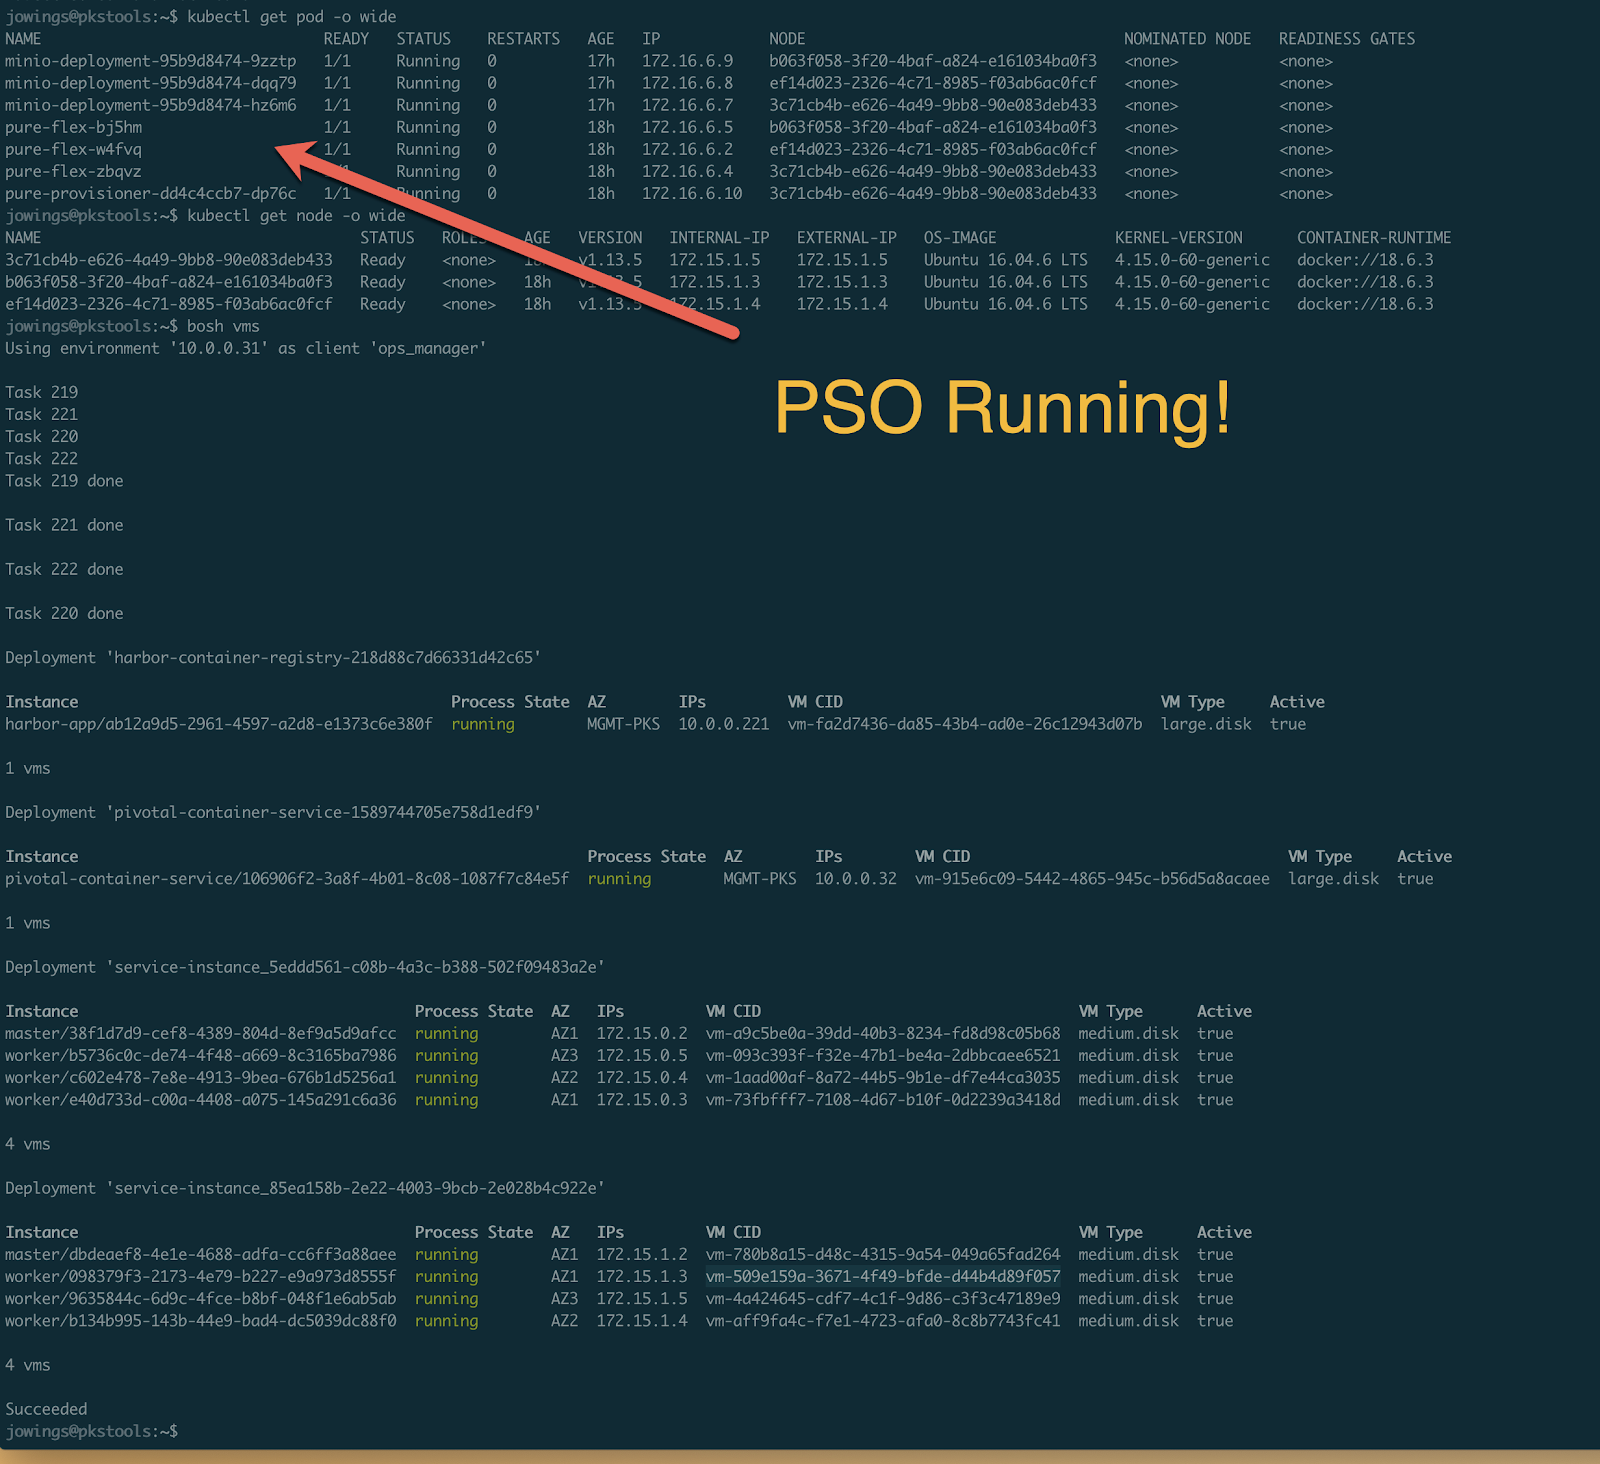
The Pure Service Orchestrator Team is excited to announce that PSO is now validated with PKS Enterprise 1.4. PSO is PKS Partner Ready.
You can find more information on the VMware Marketplace https://marketplace.vmware.com/vsx/solutions/pure-service-orchestrator-2-5-2?ref=search

Learn more about PKS and Pure Storage with these posts:
Installing PSO in PKS with Helm
Installing PSO in PKS with the Operator
Use PKS + VMware SDDC + Pure Storage
Migrating PSO Volumes into vVols and PKS
Why PSO and PKS?
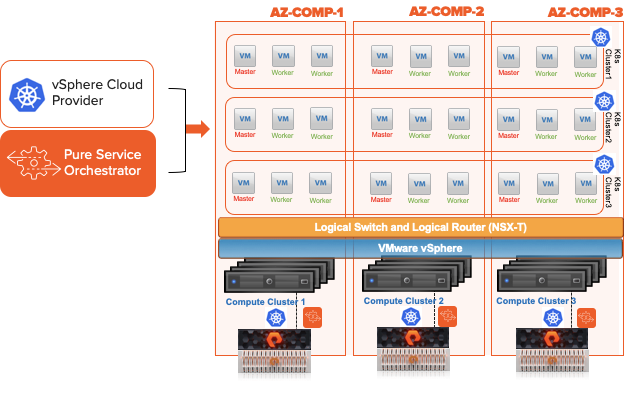
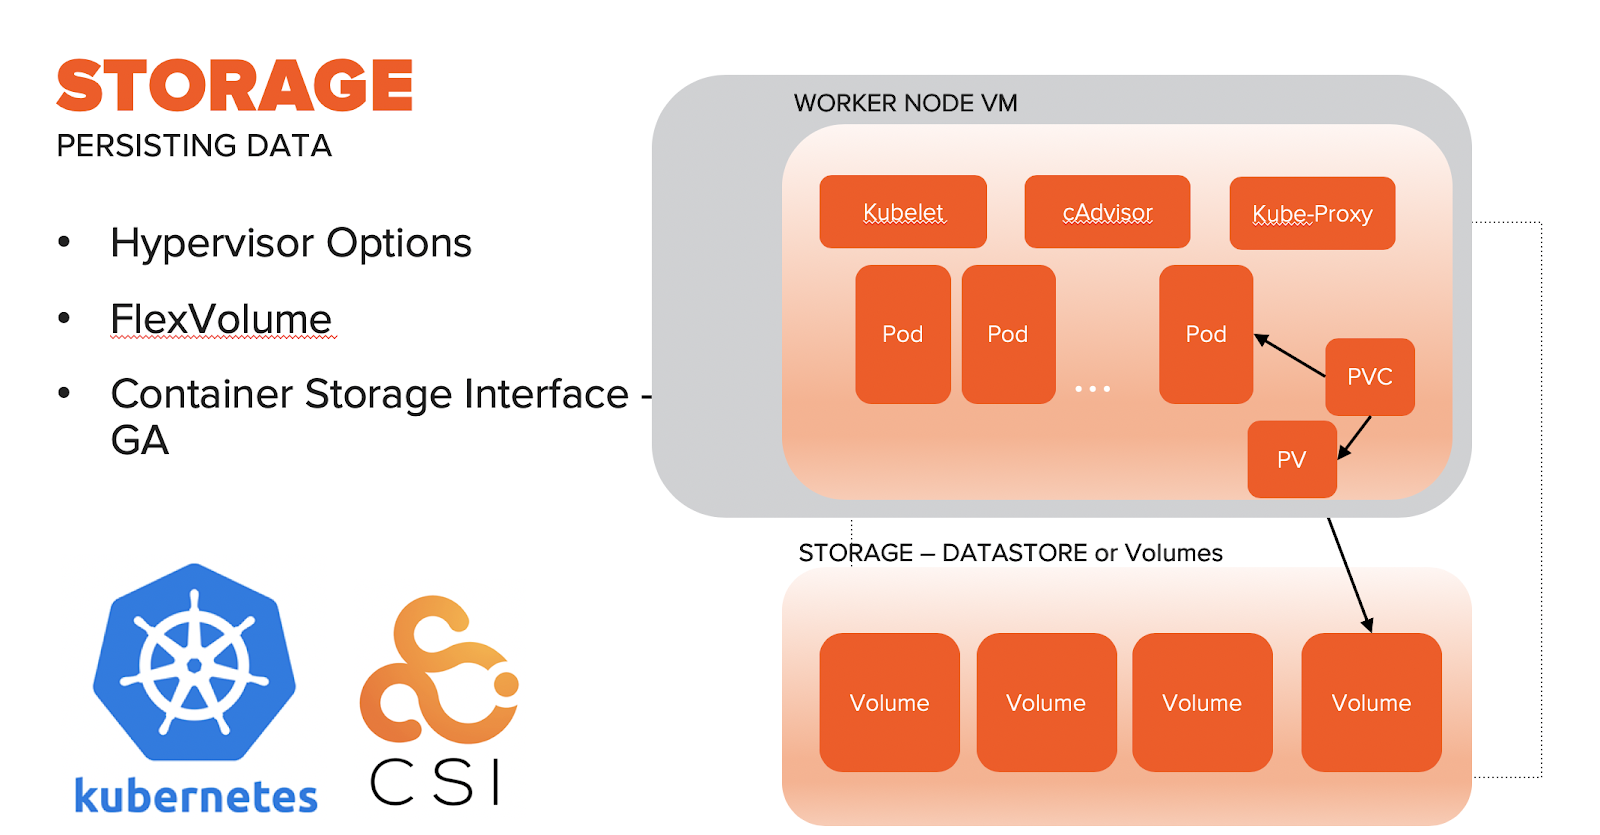
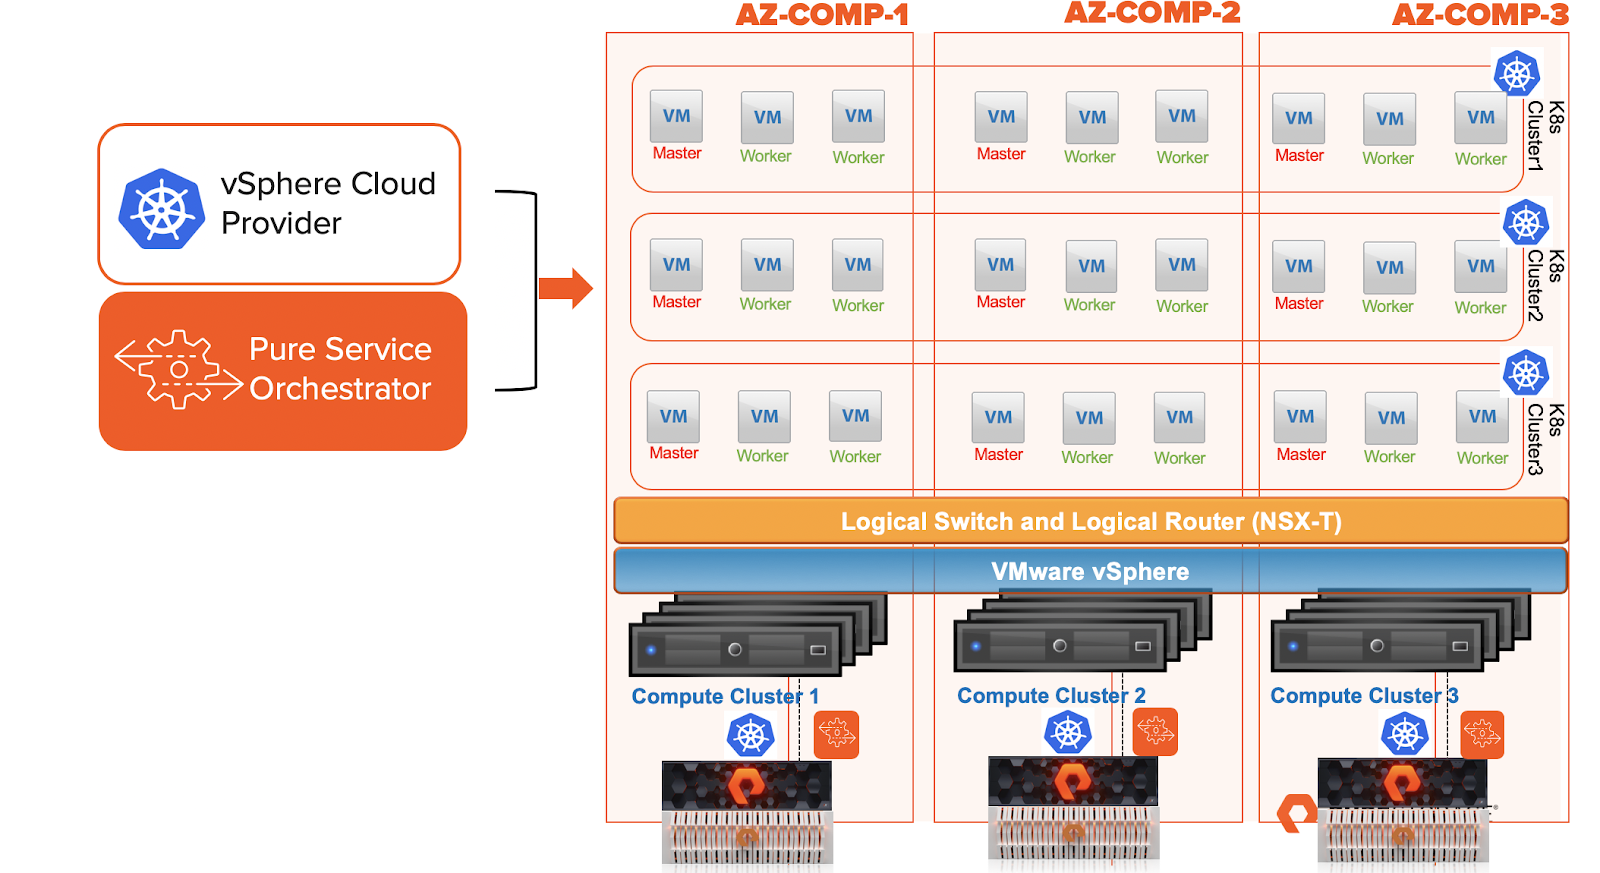
I think it is crucial to understand the options for Storage in Kubernetes first. If you have seen me present in the last 12 months you may have already seen this graphic. When I talk about Hypervisor options I am referring to the vSphere Cloud Provider (and now Cloud Native Storage). At the time you deploy the cluster you provide credentials to contact vCenter and create/manage/destroy persistent volumes on a vSphere Datastore. This option is built into PKS Enterprise. This allows you to create a custom Storage Class per datastore or even use SPBM for provisioning. Yes, that means VMFS and vVols are supported today. There is no validation or certification needed to use this plugin (VCP or CNS) with Pure Storage. Customers of PKS are already doing this today. VCP works very well with vVols. I have advocated at VMworld during my session that this unlocks data mobility options between DIY K8s clusters and PKS (or even between PKS clusters).
How does PSO fit in with PKS?
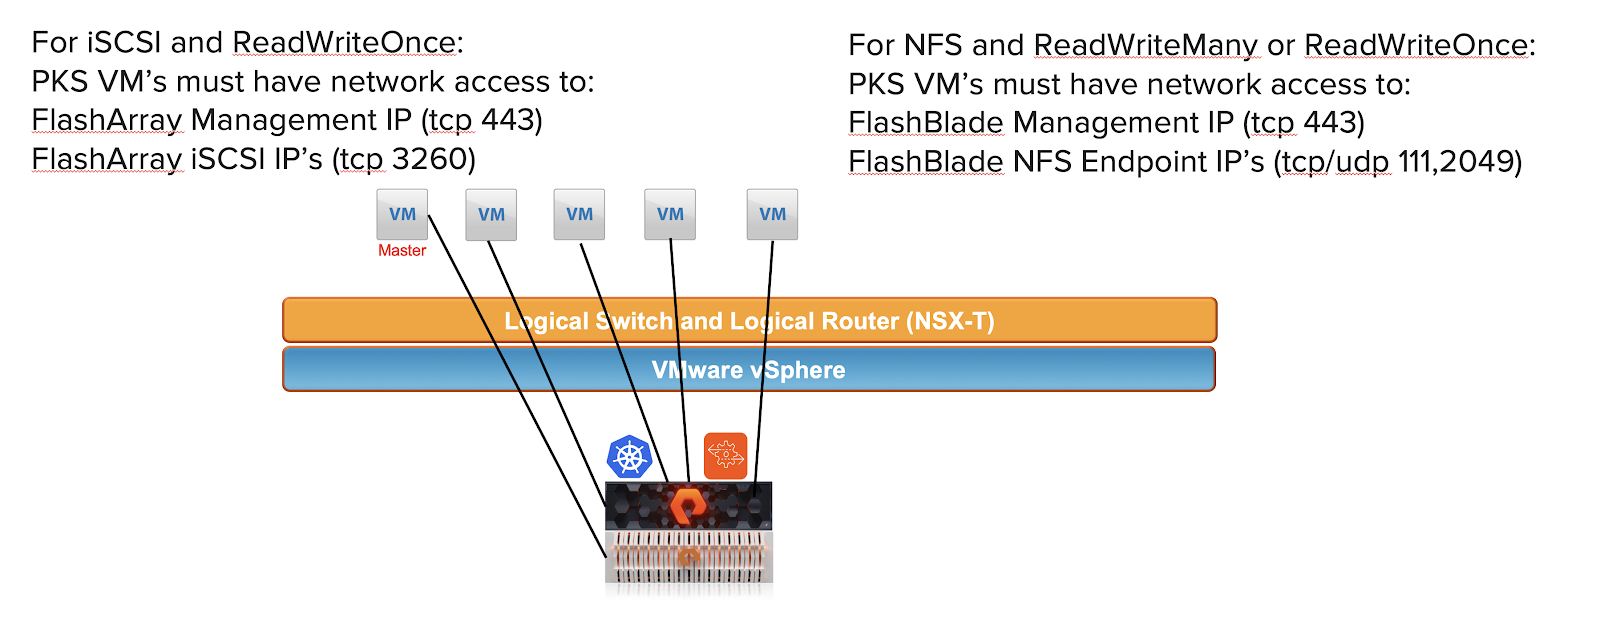
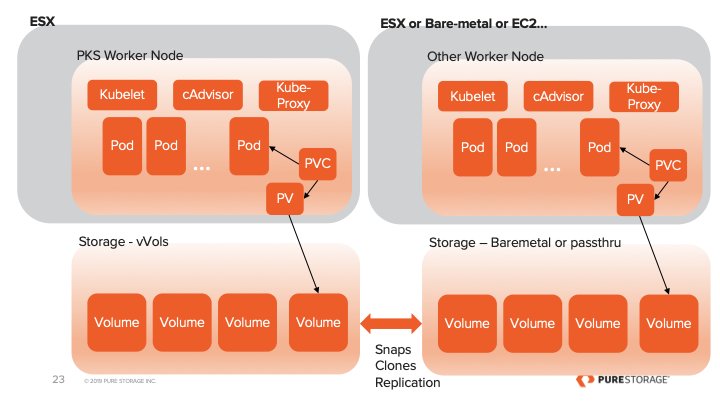
If you require “ReadWriteMany” aka RWX. This means I want many scalable containers to all attach to and use a single Persistent Volume Claim. The Pure Storage FlashBlade handles this use case. If you need simplicity in storage management across multiple devices both file and block PSO can consolidate this into a single orchestration layer deployed to any cluster with single command. PSO will also scale to new devices with a single command. Simplifying what was traditionally a very complex portion of a K8s environment.
Use vSphere Cloud Provider and Pure Service Orchestrator Side-by-Side

Due to the nature of the Storage Classes made by PSO and ones you manually create for VCP/CNS you can provide choice to the end users of PKS with only an initial install effort for the Ops team and nearly zero effort Day 2 onward. For more information please take a look at my post on “Getting Started with PKS” and the “How to install PSO in a PKS Cluster” posts.
The thing that happened was…

So if you follow k8s development at all, you know that CSI became GA at the beginning of 2019. The vSphere Cloud Provider “driver” that is in-tree is now deprecated. VMware is has released Cloud Native Storage, the CSI driver for Kubernetes clusters running on vSphere. This does not change the need for Pure Service Orchestrator for RWX volumes or even possible with in guest iSCSI too. Officially for RWO (read write once) you should be using CNS.
Learn more about PKS and Pure Storage with these posts:
Getting started with Persistent Storage and PKS
Installing PSO in PKS with Helm
Installing PSO in PKS with the Operator
Use PKS + VMware SDDC + Pure Storage
Migrating PSO Volumes into vVols and PKS